How to Detox From Mold Toxicity Part 1: Cleansing Your Environment
Mold Toxicity is a common, often severe illness that is experienced as a result of exposure to mold in one’s environment.
There are 2 main facets of sculpting a comprehensive protocol to heal from Mold Toxicity: the internal portion and the environmental portion.
Here we will be exploring the environmental portion of healing, including the 4 step process that is required to successfully cleanse one’s environment from mold contamination.
We will also be exploring some of my personal experiences and some tips and advice that I recommend, as I have extensive personal experience with Biotoxin Illness/Mold Toxicity.
Some of the links in this article are affiliate links. This means that if you click the link and subsequently make a purchase on the merchant’s website, we may earn a small commission at absolutely no additional cost to you. All opinions are entirely my own. I have used all products mentioned personally for years.
What Is Biotoxin Illness/Mold Toxicity?
Mold Toxicity can go by several names including:
- Biotoxin Illness
- Chronic Inflammatory Response Syndrome/CIRS
- Mold Illness
All of these titles refer to a health condition that is caused by exposure to mold in one’s environment – usually in the home one lives in or their workplace.
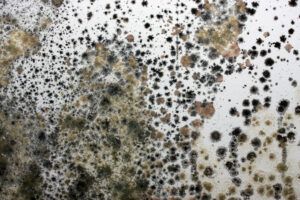
Mold is a fungus that can grow in moist areas. It is most often present as a result of water damage produced by a plumbing leak, although there are a variety of other potential causes such as a leaky roof, cracked bathtub/shower, a build up of moisture from a humid climate, condensation around windows, and more.
Not all forms of mold are toxic, such as the mold that is found as a natural part of our outdoor environment, however most types of indoor mold is toxic to humans, as this fungus releases spores and “mycotoxins” that contaminate the air that we breathe.
These toxins are also referred to as “biotoxins,” as they are toxins that are produced by a living organism, of which fungus is considered to be.
Our environment has an extremely powerful impact on our health. This fact is often forgotten, however it is vital to consider when assessing one’s health status, when healing from illness, and when maintaining optimal health.
Buildings that house mold as a result of water damage are often referred to as “sick buildings” or “water damaged buildings.”
Exposure to toxic mold is especially detrimental to those who have a genetic variant in the HLA gene, which stands for Human Leukocyte Antigen. This gene is responsible for providing instructions within the immune system for proper recognition of an antigen (a toxin or other foreign substance) so that the body may produce antibodies that will help to bind to, neutralize, eliminate, and detoxify this toxin.
However, when there is a variant in this gene, this function doesn’t occur properly, so exposure to mold will result in a build up of biotoxins within the body. Instead of being properly detoxified, they continue to circulate and cause an extensive array of serious health effects as a result.
Because of this, 2 people can live in the same home that is contaminated with mold and only 1 may become ill as a result of this exposure.
The one who becomes ill is the one who likely has the HLA gene variant.
 This can often cause a great deal of confusion, and lead to many misdiagnoses.
Those without a genetic susceptibility to developing Mold Toxicity can still develop this condition, however. It all depends on various personal factors such as your unique health history, lifestyle, and more. For example, someone with a sluggish liver and imbalanced gut has a higher likelihood of developing illness when exposed to indoor mold because these factors will decrease their ability to detoxify in general.
Those without a genetic susceptibility to mold sensitivity can also experience acute symptoms upon exposure (such as sneezing, shortness of breath, fatigue, and more), which is usually a mold allergy. These symptoms typically cease as soon as one is no longer exposed, and there are typically no lasting chronic symptoms present.
Biotoxin Illness/Mold Toxicity manifests differently person to person, however it is often a debilitating chronic illness that consists of many varying symptoms that will present simultaneously.
A great deal of the symptoms that present as a result of Mold Toxicity are caused by the systemic inflammation that the biotoxins cause. These symptoms can include chronic fatigue, hormone imbalances such as estrogen dominance, insomnia, chronic pain, migraines, weight gain, food sensitivities, chemical sensitivities, chronic sinusitis, asthma, autoimmune conditions, mobility problems, and much much more.
Much more on Biotoxin Illness, its symptoms, and physiological components can be found here.
The 2 Main Areas to Address for Healing
As mentioned above, there are 2 main facets of sculpting a comprehensive protocol to heal from Biotoxin Illness/Mold Toxicity: the internal portion and the environmental portion.
All doctors and health professionals will have a slightly different approach to the healing protocols that they recommend for Mold Toxicity, however all protocols must address both of these main facets in order to be successful.
The internal protocol is geared toward balancing your body and healing the systemic inflammation, hormone imbalances, gut imbalance, and more that the mold exposure has caused. Much more on the internal healing protocol for Mold Toxicity can be found here.
The environmental protocol is just as important, and is geared toward cleansing your surroundings and eliminating your exposure to the mold.
Equal attention must be given to both facets so that comprehensive healing may take place.
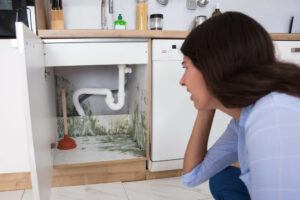
Mold Presence Is Often Not Obvious
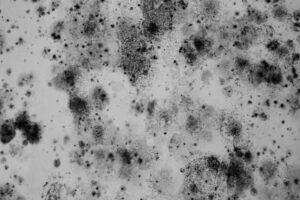
The thing with mold to be completely aware of is that the majority of the time, it is totally hidden from plain sight. A lot of times when people think of “mold contamination” they imagine a dilapidated building with visible mold all over it.
This couldn’t be farther from the reality in a lot of cases. A home that has a serious mold problem can look perfectly “normal” because mold tends to grow in dark, moist areas.
These areas can include crawlspaces, behind walls, under bathroom vanities, under bathroom tubs/showers, under flooring, behind kitchen appliances or behind kitchen cabinetry, and more.
Sometimes mold emits a noticeable smell, often a musty or earthy smell. However, it is still totally possible to have a severe mold problem without any smell at all.
The only way to truly determine the possibility of and extent of a mold problem is to have a thorough inspection performed by a professional mold inspector.
Step 1: Inspection & Lab Testing
- Professional Inspection & Air Sample Testing
The first step is to find a reputable and trustworthy mold inspector to inspect your home for the presence of mold.
The key here is that they are indeed reputable and trustworthy.
Unfortunately, the mold inspection and remediation industry does have some people within it that are not the most trustworthy and will charge unfair prices without doing an honest, thorough job. This is just something to be aware of on your hunt to find the best company in your area, because there are still plenty of excellent companies.
Research firsthand reviews from people who have used the company themselves. If you can, ask around to your family and friends and see if any of them have had experience with any companies in your area.
Some companies are solely inspection companies and others offer both the inspection and a possible remediation project.
The inspection will involve a mold inspector coming to your home and going around to every room and to your basement, attic, and/or crawlspace to inspect for the presence of mold.
They should use a moisture meter to gauge the moisture levels of your home and to assess if there are parts of your home that have a higher moisture level than others, which will mean they are more susceptible to mold growth.
They should look on, under, and behind things to the best of their ability. Such as under all vanities, in cabinetry, etc.
They should also do air sample testing in rooms or areas of your home that mold is suspected to be in.
This involves the inspector taking a baseline outdoor air sample with air testing equipment, and then acquiring air samples from areas throughout your home.
Sometimes, surface testing is performed which involves gathering samples directly on a surface. This can be where mold is visibly present or where mold is suspected to be. Surface testing isn’t as valuable as air testing however, and is usually only done to determine the type of mold that is currently present on a particular surface.
It is also worthwhile to have your heating/cooling system inspected for mold by a technician that is trained to inspect and repair the particular system that you use. For example, if you use an HVAC system, an HVAC technician can come to your home and inspect your system for mold. These inspections wouldn’t necessarily be considered professional mold inspections, but it is an additional way of identifying and/or ruling out possible sources of mold.
Average costs and additional tips and advice for this process can be found below.
- ERMI Test
ERMI stands for Environmental Relative Moldiness Index. This is a test that was developed by the US Environmental Protection Authority to help assess mold presence in indoor environments.
It is administered by collecting dust samples throughout your home and sending them to a lab where the samples will be analyzed for their mold content. This will then give a clear picture of the mold status of your home environment.
The ERMI tests for a variety of different species of indoor mold.
The scale ranges from -10 to 20. Most practitioners will recommend that anyone with Biotoxin Illness/Mold Toxicity not occupy a building unless it has an ERMI score of 2 or lower.
I use a company called EnviroBiomics Inc. and I have been very happy with their services.
I use the “swiffer method,” which involves using a swiffer cloth that is provided for you by the lab and gathering samples throughout your home and then returning the cloth to the lab for analysis.
The process involves first ordering your kit, which includes all of your supplies and instructions. You will then gather your samples, package them in the mailing supplies provided, and mail them back. You will then receive your results via email.
The results can then be used to assess whether or not you have a current mold problem in your home.
Step 2: Remediation or Moving
The initial step on every healing protocol from Mold Toxicity is to remove oneself from the source of mold.
This can often be the most complicated and challenging step.
This step can be done by moving out of the contaminated property, or having a thorough mold remediation performed.
Moving to a different home is often not an option for many people due to financial or other reasons, so remediation can be used instead.
Remediation refers to the multi-step project that is undergone to remove the mold contaminated areas and materials within a home or building.
These projects can be small, medium, or large, it all depends on the scale of the mold damage and the surface area that the mold is covering within the building.
For example, if mold has grown underneath flooring in a home, the remediation project will involve removing the flooring and possibly the sub flooring and any nearby areas that the mold grew. 
A remediation should be performed by a professional mold remediation company and finding the right company is important. More is discussed regarding this topic below.
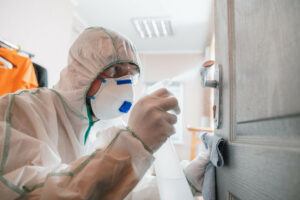
When mold is disturbed, it will release even more spores and mycotoxins. This is why it is very important to have a professional remediation done by a company that follows all of the proper steps to contain the area.
Make sure that the company that you select follows the following steps during remediation to ensure that no mold spores from the contaminated site travel throughout the rest of your home:
- Create a sealed barricade with large sheets of plastic. There will often be a zippered opening made over doorways so they may enter and exit while still containing the area.
- Run an “air scrubber” throughout the entire remediation that is connected to a tube that is secured to an exit area such as a window. This is a large machine that sucks the air out of the space and pushes it through a tube and out via a window or other exit point. This is essential so that the extra load of mold spores will exit the area as opposed to being dispersed throughout the rest of the home.
- Securely bag all contaminated items such as drywall, flooring, etc and quickly remove them from the home.
- Clean all surfaces within the remediation area with an antifungal cleaner.
After the remediation is completed, it is recommended to have the company leave the area barricaded and continue to run the air scrubber for an additional 24 hours. This helps to ensure that all spores are eliminated from the space as thoroughly as possible.
The remediation usually entails removing all of the contaminated components of the affected area, and does not include the rebuild.
A separate contractor will need to be enlisted for the rebuild.
The remediation company will replace absolutely necessary components in some cases.
For example, for one of the remediations I had performed, they had to remove the sub floor of my hallway and bathroom. As part of the completion of their project, they replaced the sub floor so that we would be able to walk on the area and it wasn’t left open to the crawlspace below.
Step 3: Post-Remediation Cleaning
After the successful remediation has been performed, it is necessary to clean your home thoroughly to remove the presence of mold spores that the previous contamination caused.
The remediation will clean the localized areas where mold was present, but mold impacts the entire home or building, not just the specific locations it was found, due to the spores and mycotoxins that it released while it was present.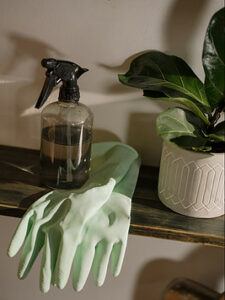
These spores move through the air and land on all surfaces and belongings within the home.
There are mixed opinions on what one should do with the belongings that were present in a mold contaminated home. The extent to which you address your belongings will depend on where the mold was present, and the severity of your particular sensitivity/illness.
For example, some will recommend that all belongings are disposed of. This is of course very extreme and not often an option for many people.
I would only recommend throwing away belongings if they had mold growing directly one them. If an item did not have mold growing directly on it, in most cases, it can be cleaned. Paper is an exception, as it is very porous and can’t be cleaned.
You can make copies of your documents and paper items and throw away the originals.
All furniture, clothing, bedding, drapes, and all surfaces such as appliances, floors, and windows will all need to be cleaned.
Hard flooring like wood and tile can be cleaned effectively, however carpet flooring may need to be replaced.
Carpet isn’t the best for your health in general, as it can house allergens and other toxins that can diminish air quality.
Furthermore, most people who have Mold Toxicity are particularly sensitive to chemicals, so natural cleaning products will need to be used. Natural cleaning products are also much better for your health in general and will not further irritate your respiratory system or create an extra toxic burden for your body to handle.
The following are steps to take to clean your home after a remediation:
-
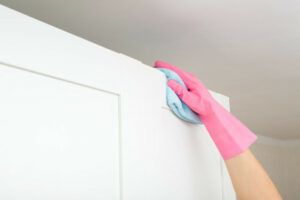
Surface Cleaning
To effectively remove all mold spores, you must clean all surfaces thoroughly with an antifungal cleaning solution.
This includes:
-
- Counters
- Floors
- Baseboards
- Furniture such as couches, chairs, tables, bookshelves, dressers, etc
- Appliances such as refrigerators, stoves, etc
- Windows & window frames
- Doors
- Ceiling fans
I use 2 main products combined for the most powerful natural antifungal cleaner and add them to a 16 oz glass spray bottle.
These include:
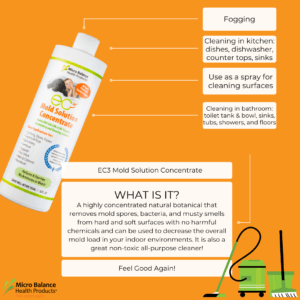
- Micro Balance Health Products Mold Solution Concentrate
This Mold Solution Concentrate is a completely natural concentrate that is made of citrus seed extracts, which house powerful antifungal properties.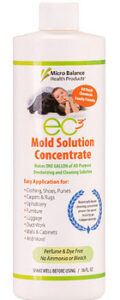
It can be used on most surfaces including both hard and soft surfaces.
To use, make your solution (my recipe is included below), and spray on all surfaces. For hard surfaces, spray on, and wipe with a clean cloth but do not rinse.
For soft surfaces, spray a thin mist over the item and allow to air dry.
This product is not meant to be used as a cleaner for actual mold that is present on a surface, it is meant to be used as a cleaner to eliminate the non visible spores that are present throughout a home as a result of mold growth.
I have used this product for post-remediation cleaning as well as a tool for maintenance to ensure that the surfaces of my home remain mold-free.
Click here for the Mold Solution Concentrate.
⭐️Use code HJE10 at checkout for 10% off of your order at Micro Balance Health Products. This code will discount all items except the mycotoxin test kits⭐️
- Vibrant Blue Oils Organic Tea Tree Oil
Vibrant Blue Oils is by far my favorite line of essential oils. They are the best quality I’ve ever found out of the many that I have tried. 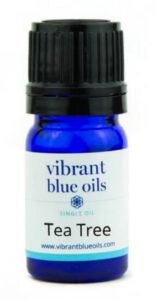
These oils are all organic and are derived from herbs that are harvested from small organic farms throughout the world.
Vibrant Blue Oils Organic Tea Tree Oil is a top quality oil that I’ve used for years.
Tea tree is a powerful natural antifungal agent and an excellent resource to use to combat mold spores.
I add this oil to the above concentrate to make a powerful natural antifungal surface cleaner.
I have not found a surface that my recipe below can’t be used on. To be safe, however, you will want to spot test any surface that you are questioning, such as antique furniture.
Click here for the Tea Tree oil.
My recipes includes:
- 2 ounces of the Micro Balance Health Products Mold Solution Concentrate
- 15 drops of the Vibrant Blue Oils Tea Tree essential oil
- Distilled water
*Pour in the concentrate, followed by the drops of essential oil, and then fill the rest of the bottle with distilled water.
When it came to cleaning the surfaces of my home after mold remediation, I did some areas myself, and hired a cleaning company to come in and do a deep cleaning as well. I was too ill to be able to do a thorough deep clean myself.
If you explain your situation and ask them to use your cleaning products that you will provide, most cleaning companies will happily accommodate your needs.
It is also helpful to use a HEPA vacuum on your floors as well, to clean up any loose debris. HEPA stands for High Efficiency Particulate Air. This is the most effective form of filter to use that is capable of filtering out small allergens and toxins such as mold spores.
-
Cleaning Clothing, Bedding, and Fabrics
Cleaning all fabrics within the home including all of your clothing (including all clothing hanging in your closet, in your dressers, etc), all bedding including your pillows, all of the contents of your linen closet, and all other fabrics such as curtains is an important part of your cleaning process.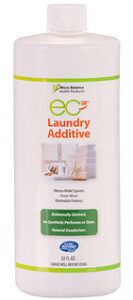
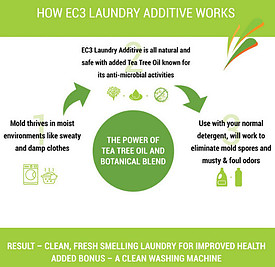
The most awesome tool I have used for this purpose is Micro Balance Health Products Laundry Additive.
This is a totally natural, gentle solution that is made of distilled water, tea tree oil, citrus oil, and tangerine oil.
All of these ingredients have powerful antifungal properties that help to kill mold spores and bacteria that is present on your fabrics.
It can be used for all fabrics that can be laundered. I have never had any fabric that I’ve washed with it become adversely effected by this solution in any way.
You only need 2 to 3 ounces per load.
After using this for post-remediation cleaning of all fabrics, I now use this in every load of laundry that I do to account for the mold spores that I pick up outside of my home in other locations. I also use this as a form of continual maintenance.
1 bottle lasts me about 16 loads of laundry.
You can add Laundry Additive to the rinse cycle reservoir, where fabric softener is designated to go, or you can add it to the washing machine basin itself to be used alongside your laundry detergent. I do both – about 1 ounce in each area.
It has a light, citrus scent but it does not add scent to your clothing or fabrics.
I also use this to periodically clean the washing machine itself, as washing machines are susceptible to mold growth. I just add 1 ounce to the washing basin and 1 ounce to the rinse cycle reservoir and run a “clean washer” cycle with hot water.
Click here to check it out.
⭐️Use code HJE10 at checkout for 10% off of your order at Micro Balance Health Products. This code will discount all items except the mycotoxin test kits⭐️
-
Cleaning the Air
Cleansing the air is an important part of the cleaning process, as mold spores travel through the air and this is how we breathe them in, which subsequently causes ill health.
There are a few ways that this can be done.
1. Let Fresh Outdoor Air In
On dry days, it is helpful for improving indoor air quality in general by opening some windows in your home for about 30 to 45 minutes to allow fresh air to circulate. Refrain from doing this if it has just rained or if the humidity is high, as you do not want to increase the humidity levels within your home.
2. Air Purification Candles
Another effective air cleansing tool that I have used are the EC3 Air Purification Candles.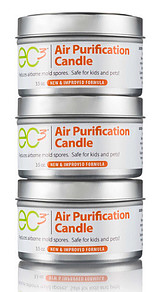
These candles are made of natural ingredients including antifungal citrus oils, which will become infused into the air when the candle is burned.
Each candle will burn for approximately 12 hours.
It is recommended to burn the candle for 3 hours for the first time you use it which helps increase the effectiveness of the candle. After that, burning for at least 1 hour per session is recommended. I usually burn the candle for about 1 to 2 hours at a time.
These candles are a simple and easy tool that work best when combined with the other steps included in this article.
Click here to check them out.
⭐️Use code HJE10 at checkout for 10% off of your order at Micro Balance Health Products. This code will discount all items except the mycotoxin test kits⭐️
3. HEPA Air Purifier
Using good quality HEPA filter air purifiers throughout your home is an excellent way to maintain clean indoor air. These specialized filters are able to filter microscopic particles such as mold spores and other airborne toxins and allergens.
Medify Air MA-40 HEPA air purifier is a top quality purifier that is highly effective for cleansing your living environment of mold spores after remediation and as a form of maintenance. 
As mentioned above, HEPA stands for High Efficiency Particulate Air. These are specialized filters that are capable of filtering airborne toxins and contaminants such as mold spores, dust, pollen, bacteria, smoke, pet dander, and more.
Unlike most other HEPA purifiers, Medify Air’s “true HEPA H13” and “true HEPA H14” filters can filter down to 0.1 microns, which means that the filter can capture a higher quantity of airborne contaminants and pathogens, up to 99.9% and 99.99%, respectively.
This purifier is equipped with a 3 stage filter system which includes a prefilter to catch larger particles, the HEPA filter in the middle, and an activated carbon filter which absorbs and eliminates odors.
Click here to check it out.
⭐️Use code MEGAN15 at checkout for $15 off of your order at Medify Air :)⭐️
Fogging your home is another very effective way to cleanse the air of mold spores, which is explained further below.
-
Fogging
Fogging is an excellent way to be able to reach all of the areas that manual/standard cleaning methods can’t reach or don’t include, such as the walls and small cracks and crevices.
Fogging involves using an antifungal solution in a fogger machine that creates a very fine mist and distributes it evenly throughout your home.
This is an effective part of the cleaning protocol after a successful remediation has been performed.
The very best fogger that I have found and the one that I use is the EC3 Sanitizer Fogger.
This fogger is sold with the Mold Solution Concentrate, as described above.
This is a manual use fogger that has a long spraying reach so it is able to reach all surfaces in your home.
The mist produced by this fogger is ultra fine and does not dampen your belongings, as everything will feel dry to the touch when the fogger is used correctly.
I have used this fogger to fog my entire home after several remediations (more on my personal experiences is included below), and I now use it for maintenance to keep the air free of mold spores.
To make the solution for the fogger, you will pour about 16 ounces out of a gallon container of distilled water and then add the entire bottle of Mold Solution Concentrate (16 ounces) and shake to blend. Then you will pour this solution into the base of the fogger, secure the black lid, and begin fogging.
It is very easy to use, as you simply plug it in, adjust the direction of the sprayer to your desired angle, hold the fogger up, and turn it on. The fogger will then dispurse the mist.
Purchasing a fogger is an investment, but a worthy one for sure. It makes a huge difference in the air quality of your home and you can tell a difference after fogging.
It also helps grant peace of mind knowing that you are continuously ensuring that your air quality is optimized which is imperative for your health.
Click here to check it out.
⭐️Use code HJE10 at checkout for 10% off of your order at Micro Balance Health Products. This code will discount all items except the mycotoxin test kits⭐️
Step 4: Maintenance
Maintaining a mold free living environment after moving or remediation is an important part of your healing journey.
Those with Biotoxin Illness/Mold Toxicity begin to heal over time, after the source of the mold is removed and an internal healing protocol is implemented. However, the success of the healing protocol completely depends on remaining in a mold-free environment.
To do this, you can continue some of the steps above to ensure that your environment remains mold-free.
Maintenance steps can include:
- Using Laundry Additive for laundering your clothing most of the time.
- Spraying your natural antifungal cleaning solution on the surfaces throughout your home about once or twice a month.
- Fogging your home about once a month, or at most once every 2 months.
- Burning the purification candles periodically.
- Continuing to open your windows on dry days for 30 to 45 minutes to allow fresh air to circulate.
- Being sure to run your bathroom fan while showering.
- Making sure to check for plumbing leaks regularly.
- Having a mold inspection done about once a year or once every 2 years.
You will also want to do an ERMI test on any future potential living spaces to make sure that they are suitable for you to occupy and are free of mold.
There is an option to do an overnight ERMI test, which can be helpful when it comes to renting and needing to secure a house or apartment quickly.
A Bit of My Personal Experiences
A large part of my healing journey has involved healing from a severe case of Biotoxin Illness/Mold Toxicity.
I had been living in a home that was contaminated with mold in multiple hidden locations for years. I had no knowledge of the fact that mold exposure was one of the leading causes of the severe illness I was experiencing until my personal research led me to looking into whether environmental toxins where a part of my underlying cause.
I had quite a complicated experience with mold inspections and subsequent remediations.
I found the initial company who claimed to specialize in mold inspection and remediation. They inspected my home and determined that there was a mold problem in the crawlspace so we scheduled a remediation to clean the whole crawlspace.
I then did a thorough cleaning as described above in step 3, and did a follow up ERMI test, which came back very high, at 23.
So I found another company to come in and do another inspection with air sample testing and surface testing. They inspected the whole home as well as the crawlspace again, and determined that the crawlspace still had a mold problem.
I then scheduled a remediation with this company, who did follow the proper precautionary steps as described above. This company then claimed that the crawlspace was squeaky clean and the rest of the home was as well.
So I did another round of cleaning as described in step 3 above and another follow up ERMI test, which still came back very high. It had gone down all of 4 points, to 19.
At this point, I knew finding a top notch company was imperative, so I did additional in depth research and finally found a company that seemed to be excellent, and they were.
The third and final company ended up finding 2 large areas within my home where considerable mold was present. These areas where completely missed by the first 2 companies.
One of the areas was very visible from the crawlspace, as it was on the sub floor of one of my bathrooms, where mold and water damage had seeped through the sub floor and into the crawlspace. This was not mentioned by the first 2 companies, even though it was incredibly obvious if you were in the crawlspace inspecting it or working in it.
So I had a 3rd remediation scheduled for these areas.
Shortly after the 3rd remediation, I also ended up finding another area, under the flooring in my hallway. There was an ever-so-slight unevenness on the flooring that, upon close inspection, I thought may have been caused by water damage. I then had the 3rd company come back and confirm my suspicion.
This was the gold mine as it was indeed caused by water damage from a very old hidden water leak in one of my bathrooms that had leaked all the way into the hall under the flooring. The unevenness wasn’t that obvious, but after having gone through all of the previous experiences and having done extensive research on what to look for I was able to identify it.
Black mold had grown all behind the drywall, behind all of the baseboards, under the flooring, and up the inside of the door frame.
The 4th and final remediation was the biggest of them all, which removed the floor and sub floor in the bathroom and hall, drywall, baseboards, and door frame of all of the affected areas.
This company took the most precaution and followed the correct steps for a remediation as explained above.
In total, I ended up hiring 3 different mold inspection/remediation companies and having 4 different remediation projects done.
Some Tips and Advice
I hope that you won’t have to experience the same types of complications, after becoming aware of some of the things to look out for and making sure to find a very reputable and trustworthy inspector from the start.
It is wise to be a very active part of the inspection and keen observer of the remediation. You must make sure that the company is doing a thorough job.
For the inspection, make sure that they are looking on and under spaces and that they are using a moisture meter to gauge the moisture levels of your home.
An important note regarding the inspection as well is to avoid going into potentially hazardous areas. Monitor the inspection without going into areas like your crawlspace if you suspect there is considerable mold present there. Have the inspector take pictures and show them to you for any areas like this.
During the remediation, make sure that they are following all of the proper steps, and if not, do not hesitate to speak up about it.
Ask them lots of questions and be a proactive part of the process. By this I mean keenly observe and have thorough communication, but maintain a safe distance in regard to being around hazardous areas.
For most remediations, it is best that you are not present during the actual project, and return home following its completion. You can also have someone who is not as sensitive to mold as you are remain at your home during the project as well.
If a remediation is done correctly, the area will be completely barricaded off, however its best to be safe and extra cautious in these types of situations.
Furthermore, as mentioned above, the mold remediation industry has a considerable amount of people who aren’t the most trustworthy so this is something to look out for. This isn’t to say that all of them are like this, because there are certainly really wonderful companies who will do a very thorough job and remain totally honest with you throughout the whole process.
The key is to find these companies from the beginning.
An additional tip would be to ask about financing options. Remediations can be expensive, and more and more companies are offering financing options so that you can pay for the total cost over time instead of all at once.
So that you have a rough idea of what to expect and to know if a company is quoting you a fair price, the following are some of the average costs involved. Do know that the costs can vary significantly, especially remediation costs, because it all depends on how large of an area the project involves, how large your home is, and other varying factors.
Average costs:
- Inspection: $300 – $800
- Air sample testing: $200 – $500 (this will depend on how many samples are taken)
- ERMI test: $240 – $435 (this depends on the time frame that you select to receive your results, quicker results are more expensive)
- Remediation: $500 – $6,000+
Begin your inspection and remediation journey having done thorough research so that you have the knowledge of what to look for and can be an active part of the process.
Emotional Healing and Mindset
After going through the challenges associated with having a mold problem in your home, the resulting illness, and other complications, we can certainly become rather fearful of mold and see it as a strong “threat.” Some of these experiences can also be traumatic, as this process can involve many sudden changes, challenges, financial burdens, severe and serious illness, and much more.
That said, it is important to take all of this one step at a time and know that you will heal, and that this will all be ok.
Seek out emotional support while going through this, and make sure to address any possible trauma that you may be experiencing. Much more on trauma and effective healing resources can be found here.
While it is of course best to remain aware of your living space and do your best to keep your home mold-free, do know that mold is a natural part of our world and while it is toxic to our health when present indoors, it does not have to be feared.
As you evolve through your healing, know that it is entirely possible to live in a state of conscious awareness, without living in a state of fear.
You can do this. You are so strong. This will all be in your rear view mirror soon. There is a light at the end of the tunnel and your future is so bright.
In Closing…
As we’ve explored here, accounting for the environmental portion is an incredibly important part of healing from Mold Toxicity.
This can be a complex and challenging process, so just take it one step at a time and you will be successful in your environmental healing journey.
If you have any questions about my personal experiences, please don’t hesitate to reach out! You may contact me directly at megan@healingjourneyessentials.com, submit the contact form on our contact page, or leave a comment below.
REFERENCES
Reference 1: Vetter, Paula, Rossi, Laurie, Edwards, Cindy. Mold Illness: Surviving and Thriving, A Recovery Manual for Patients & Families Impacted by CIRS. BookBaby Publishers, 2018.
Reference 2: Nathan, Neil. Toxic: Heal Your Body from Mold Toxicity, Lyme Disease, Multiple Chemical Sensitivities, and Chronic Environmental Illness. Victory Belt Publishing, 2018.
Reference 3: Nathan, Neil. Mold and Mycotoxins: Current Evaluation & Treatment 2022. BookBaby Publishers, 2022.
This is so helpful. Thank you!
Hi Megan! You’re most welcome, I’m so glad you’ve found it helpful! All the best to you 🙂